This post is the last of a 3-part series on how to track your fitness. We advise you read our guide to planning your fitness and key areas to focus on first.
How to Keep Track of Your Fitness
What’s Next?
Now we know which areas of fitness have the largest impact on performance, the next step is to record our current fitness level (stage 3 of the checklist) so we can get a deeper understanding of our strengths and weakness in these areas (stage 4).
There are heaps of fitness tests out there: some you might have already done, some you might not have. It can be difficult to know which ones to use – some involve expensive equipment and others are simply just not appropriate for our sport. Let’s delve in to find out which will help you track your fitness in the most efficient way.
Now I am going to assume that most of you don’t have access to high tech sport science laboratories / Batcaves, so my aim once again will be to use science to help us pick out some fitness tests that can be done on a budget. This by no means is a comprehensive and exhaustive review of all tests that you can perform, but I will try to give a clear science-based rationale for each test (100% free of boot-room chat).
The Skills Quest Conditioning Assessment
The United States Sports Academy (USSA) Sport Science Department has come up with an excellent series of fitness tests called The Skill Quest Conditioning Assessment (SQCA). The USSA has designed the test to go along with the US Ski Teams Skills Quest program as part of a way to monitor the progress of juniors skiers off the hill.
The tests cover ages from 2 up to 17+ years old. We will focus on the 17+ age range (phase 6). I know some of you might be a little older, but we are all young at heart, plus the USSA are classing athletes in phase 6 as “biologically matured”.

In brief, the tests for Phase 6 covers these key areas;
- Balance and Coordination Test
- Strength and Functional Movement Test
- Anaerobic Power Test
- Anaerobic Capacity Test
- Aerobic Capacity Test
Balance and Coordination Test
Due to the highly technical nature of skiing, it is vital to be able to coordinate the whole body. Doing so in a controlled and balanced manner helps the skier correctly execute the technical skills required for high-level performance. It won’t be a huge surprise to you to know that due to the highly technical nature of skiing, “time on snow” is vital to aid the development of athletic performance (Nygaard et al. 1978). Unfortunately, we can’t always be on snow as it tends to melt… 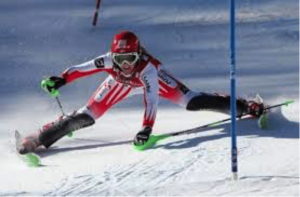 When training on snow is limited or impractical it is vitally important to make sure that your training in the gym is both effective and relevant (Laurent et al., 1993; Bachrach and Duvillard 1995).
To keep track of how your off-snow training is affecting your balance and coordination skills, it is important to find a test that you can perform that tests both. Luckily the USSA has us covered.
Balance Beam Test
Equipment:
- Foam (low) balance beam or a 4″x2″ piece of wood that is stabilised at both ends. The beam should be at least 6 feet long.
Protocol
Place the balance beam on the floor. If you have protective foam mats, place them beside the beam.
The athlete should complete the following whilst keeping both hands on their head:
-
- Walk along the beam (0-3)
- Next, walk along the beam, half turn and walk back (4-6)
- Finally walk along the beam with eyes closed (be sure to let the athlete know when they have reached the end of the beam) (7-10)
Gap Analysis
Record a score out of 10 based on how far the athlete progressed in the test.
Strength and Functional Movement Test
If you’ve read the second post, you will already know that strength is an important component for skiing fitness but is not the be-all and end-all. No correlation was found between the leg strength of elite skiers and their world cup standings. However, leg strength in skiers was found to be higher than in other sports. So strength does count for something, but mainly in slower movements and during eccentric contractions.
In a real-world context, this means that beyond a certain minimum level of strength, no further gains on performance are made (Neumayr et al., 2003). The same can be said for flexibility (Anderson and Montgomery. 1988). That being said, insufficient strength and flexibility lower your ability to deal with certain movements, such as the high forces and the eccentrically loaded (muscle lengthening under tension) squatting actions that are required during skiing. This can even lead to a higher risk of injuries, of the knee (Turnbull et al., 2009). This highlights the importance of testing your squatting movement strength and functional movement/flexibility at your joints.
The test detailed below by the USSA focuses more on flexibility and functional movement, rather than measuring the contractile force generated during the movements. This is an ideal test for trainees new to fitness training as it focuses on correct lifting technique.
Overhead Squat with Broomstick Test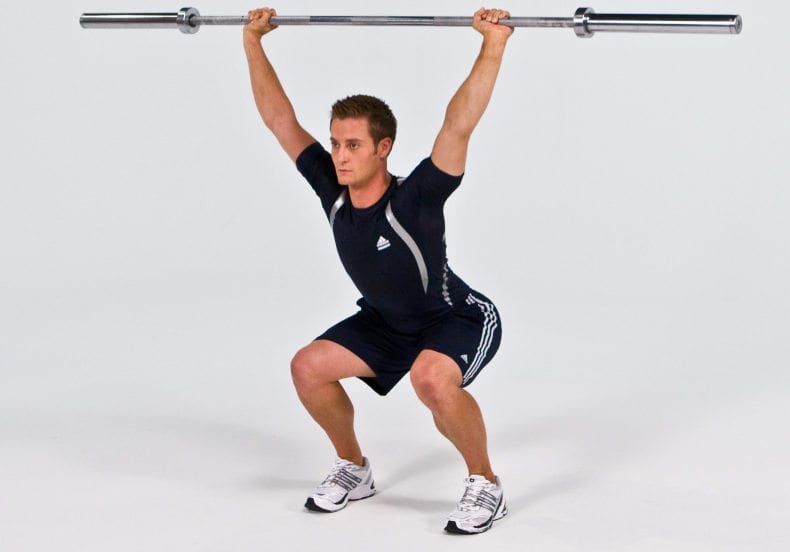
Equipment:
- Broomstick or piece of PVC pipe
- Piece of 4″x2″ wood for placing under the heels if needed.
Protocol
Position the broomstick above the head with arms angled out at 45 degrees. Feet should be slightly wider than hips with toes pointed slightly outward. Start by holding the stick on the head and elbows at 90 degrees then raise the stick up and lock out elbows.
Ask the athlete to squat down as far as he/she can go whilst keeping the broom parallel to the floor, then stand up and repeat up to 5 times if necessary. Instruct the athlete to keep the chest up and back flat and keep the elbows locked out. If the athlete cannot perform the squat correctly, place the 4×2 under the heels and repeat the test.
Gap Analysis
Analyse and score the technique according to the following criteria:
- 0 = athlete has pain or cannot get into the squat position
- 1 (bronze) = poor technique if any of the following are observed: tibia and upper torso are not parallel, femur is not below horizontal, knees are not aligned over feet, lumbar flexion (stick comes forward over feet).
- 2 (silver) = good technique, but 4×2 under heels is needed. Upper torso is parallel with tibia or toward vertical, femur is below horizontal, knees are aligned over feet, stick is aligned over feet.
- 3 (gold) = no 4×2 under heels is needed. Upper torso is parallel with tibia or toward vertical, femur is below horizontal, knees are aligned over feet, stick is aligned over feet.
And for a optional extra should you so desire…
Single Leg Squat Test
Equipment
- Broomstick or piece of PVC pipe
- Piece of 4×2 wood for placing under the heels if needed
Protocol
The rationale for inclusion: This test is a progression for those athletes who are consistently scoring gold on the overhead squat test. It is harder and requires more strength. It also assesses any imbalances between left and right side strength.
The athlete should stand on the edge of a tall box so the foot of the non-testing leg has room to hang down. Place a foam mat on the floor next to the box in case the athlete loses their balance. The testing leg should be on the edge of the box with the non-testing leg hanging over the edge. Then undertake the above exercise on one leg at a time, testing each side as before.
Gap Analysis
Assess and score the technique according to the following criteria:
-
- 0 = athlete has pain or cannot get into the squat position
- 1 (bronze) = poor technique if any of the following are observed: tibia and upper torso are not parallel, femur is not below horizontal, knees are not aligned over feet, lumbar flexion (stick comes forward over feet).
- 2 (silver) = good technique, but 4×2 under heel is needed. Upper torso is parallel with tibia or toward vertical, femur is below horizontal, knees are aligned over feet, stick is aligned over feet.
- 3 (gold) = no 4×2 under heels is needed. Upper torso is parallel with tibia or toward vertical, femur is below horizontal, knees are aligned over feet, stick is aligned over feet.
Assess and score each leg independently. The athlete’s total score is the average of the right leg trial and the left leg trial.
Anaerobic Power Test
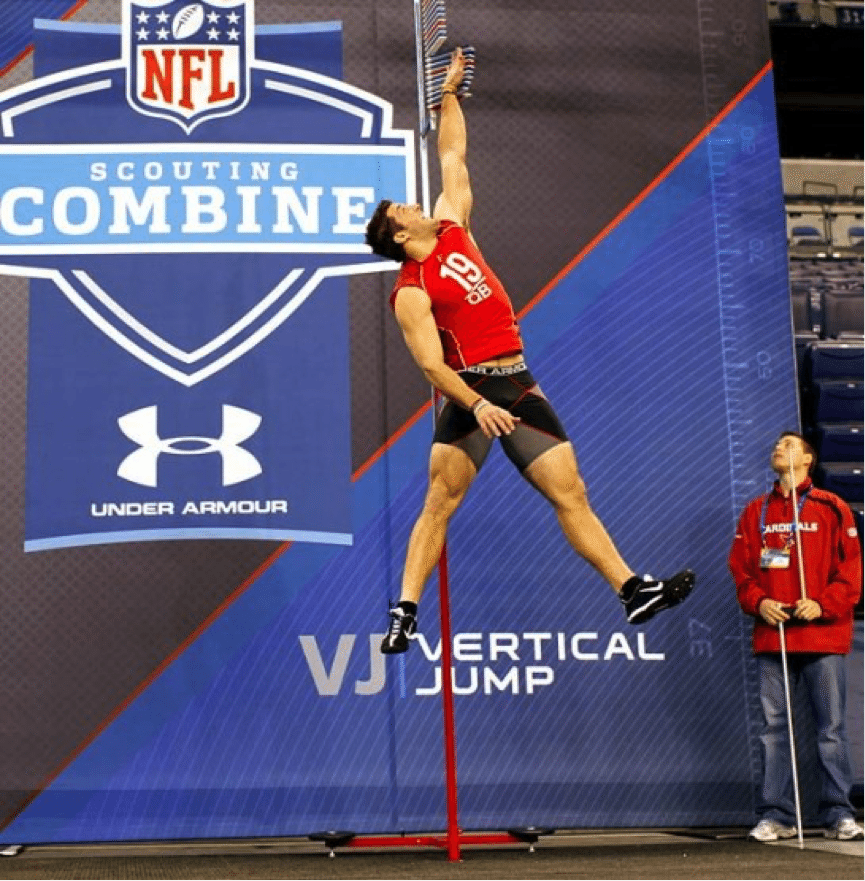
Anaerobic energy production reportedly accounts for 65% of all energy production during alpine ski performance (Turnbull et al. 2009). Furthermore, the vertical jump test on anaerobic power below has been found by many scientific studies as the best fitness indicator of skier performance (Duvillard, 1995; White & Johnson, 1993). Sounds pretty conclusive then, and its pretty easy to perform.
Vertical Jump Test
Equipment
- Wall
- Chalk
- Measuring tape
Protocol
- An athlete stands next to the wall and reaches up with their dominant arm as high as they can reach. The tester should help pull their hand upwards into a maximal reach position. Make a mark on the chalkboard.
- The athlete is then instructed to jump as high as possible and slap the wall with chalked up fingers at the highest point of the jump. The jump is from a stationary start – no stepping into the jump is allowed.
- Repeat 3 times. Record the score in cm. Score the highest jump, measurements taken from the maximal reach mark to the maximal jump mark.
Gap Analysis
Assess and score according to the following norms:

Anaerobic Capacity Test
As we have already learnt, anaerobic energy systems are very important to skiing performance. The exercise above tests your one-off explosive anaerobic power and the next assesses a estimate of your anaerobic capacity. This is the maximal amount of energy (or ATP for you nerds out there) you can produce via anaerobic energy synthesis. There are many tests for anaerobic capacity, the gold standard test being the 30-second or 60-second Wingate Test. This one can be a bit difficult to perform on a budget in your back garden as you need an exercise bike, weights and other gizmos, so we’ll leave that one alone.
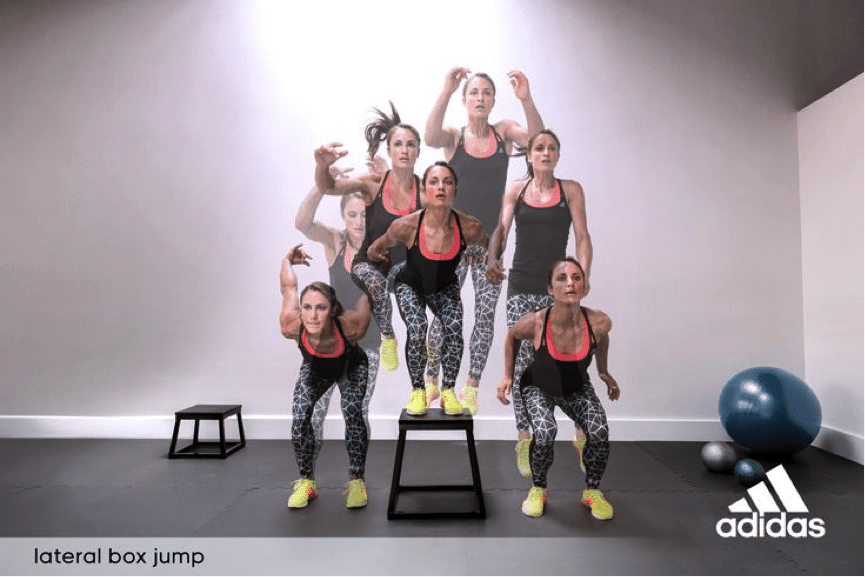
The USSA designed a similar test for anaerobic capacity includes a 60 second 40cm lateral box jump. This test is brilliant and has actually been found by science to be (along with the HEX test) the best anaerobic capacity test that correlates with skiing performance. This emphasises the need to move the feet under the centre of mass during the box jump, which is a crucial aspect of skiing itself (Anderson et al. 1990).
Lateral Box Jump Test
Equipment
- Either a 30 or 40 cm box should be used, depending on which box is closer to the top of the athlete’s knee cap. A line may be marked at the 35cm point on the 40cm box for assessing this. If the top of the kneecap is above the 35cm line, use the 40cm box.
- Stopwatch
Protocol
The athlete stands on the box. On “go”, he or she is to perform as many box jumps as possible within 60 seconds. The jumping goes from the top of the box, jumping up and down alternating between left and right sides.
- The athlete is instructed to jump and land in the middle of the box to ensure maximum safety.
- One jump is recorded when the athlete lands back on top of the box. Count the number of jumps before the tester yells, “stop”. Incomplete jumps should not be counted.
- Optional: Record how many jumps the athlete has completed at each ten-second interval (:10, 20, 30 and so on) as well as the total number of jumps.
Gap Analysis
Unfortunately, there is not many normative data that is readily available for this test, even though it has such a high scientific value. Luckily I found some data from Alpine Ontario Alpin. It’s not clear where they have got their test scores from and its only for under 18’s, so you might have to add a pinch of salt when you are making your gap analysis.

Aerobic Capacity Test
Aerobic capacity, as we discovered in the last post, is not a component of fitness that has a hugely significant effect on performance during skiing. It is more likely to aid performance indirectly. Having a good aerobic capacity allows you to recover from a skiing performance faster, which is advantageous in the long term as it allows you to fit in more training runs within a training session and therefore maximising your time on snow.
The gold standard test for aerobic capacity is a VO2 Max test, unfortunately, this test is impractical and expensive as it requires a trip to the Batcave again… Luckily there are heaps of estimative test you can perform that don’t need lots of equipment. The 20 meter Multi Stage Fitness Test (MSFT), aka the dreaded BLEEP TEST, seems to be the gold standard field test for indirectly measuring aerobic capacity by ski teams. It is claimed in Turnbull et al (2009) that the 180 turns at the end of each shuttle phase makes it more specific to the actions of skiing (compared to other tests that involve straight line runs).
Therefore if you want to get a good idea of your aerobic fitness, embrace the bleeps.
Multi-Stage Fitness Test (MSFT)
Equipment
- Cones
- 20 m measuring tape
- Outside space
- Sound System or iphone
- MSFT CD or MP3
Protocol
- Mark out two lines, 20m apart on a non-slip surface – preferably an indoor court surface/running track.
- Check that the athlete has good footwear. If the floor surface is slippery, spray some sports drink on their shoes – it works!
- The test starts with a countdown beep. The athlete runs along the 20m track and gets to the line in time with the beep. The athlete then turns and runs back, getting back to the start line in time with the next beep. The beeps get closer together as the test progresses, so the athlete has to run faster to stay in time. The test is a maximal test and the athlete is encouraged to run in time with the beeps for as long as possible.
- When the athlete can no longer keep in time with the beep and falls behind the beep by more than 1 meter, a verbal warning is given. If they do not make it back in time with the beep on the next lap, the athlete is asked to stop and the score for the stage/level is recorded. The score is the last level that the athlete successfully achieved in time with the beep.
- The athlete may miss the beep multiple times as long as they are back to the other line on the next beep. Missing two consecutive beeps ends the test.
- It is important that the athletes run in time with the beep and do not run ahead of it. This will cause additional fatigue.
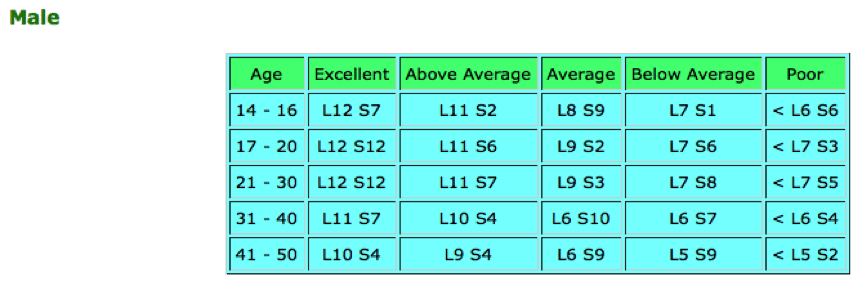
Gap Analysis
These are the results from Alpine Ontario Alpin, detailing the norms for under 18’s elite skiers.

These are the norms for MSFT taken from Bizley et all (2010).

Summary
So to summarise, here are the list of the main fitness tests you should be trying to perform at the start of your program and then roughly every 6 weeks, so you’re keeping track of things throughout your summer fitness-training program:
- Balance Beam Test – tests balance and coordination
- Overhead Squat with Broomstick Test – tests strength and functional movement
- Vertical Jump Test – tests anaerobic power
- Lateral Box Jump Test – tests anaerobic capacity
- Multi Stage Fitness Test – tests aerobic capacity
Now go DO them and remember this: if its the first time you have done them, you are guaranteed to make a PB!

If you’re interested in one of our ski instructor training courses, sign up below to find the right course for you.
